
Cooking with Steel Pans
Ray Varghese Madathil
Have you ever seen those videos on TikTok where a drop of water dances on the surface of the pan before a perfectly seared steak or picture-perfect egg is produced?
Whether it is the consequence of a clever marketing tactic, a propaganda campaign against nonstick pans, or a genuinely “slept-on” cooking tool, people are increasingly turning to steel pans as an alternative to their favorite Teflon cookware, but how do you actually use one effectively?
18/8 stainless steel pans first became widespread in the 1930s, just over twenty years after stainless steel was first invented, whilst searching for a corrosion-resistant alloy with which to make gun barrels. The term 18/8 refers to the percentage of chromium and nickel, respectively, the metals responsible for giving stainless steel its signature corrosion resistance, toughness, and shiny, highly-polished appearance. The stainless steel which we are more familiar with today made its appearance in the ‘70s, with the inclusion of 2% molybdenum for improved chloride and acid resistance, as well as a higher percentage of nickel (for a total of 10%, or 18/10) for a shinier appearance. Interestingly enough, as can be seen, modern stainless steel pans are not actually entirely made of steel; they contain a copper or aluminum core to enable better heat conductivity, which is relatively poor in steel alone. Even the parts of a modern stainless steel pan that are steel aren’t all the same kind of steel; the cook surface is typically made of austenitic 18/10 steel, which is non-magnetic as a result of its high nickel content, while the base is made of a magnetic stainless steel in order to render the pan induction-stove compatible. So, make sure you aren’t purchasing vintage, single-ply 18/8 or 18/10 pans if you have an induction stove!
But other than its corrosion resistance, what else is unique about stainless steel? With an aluminum or copper core, stainless steel is a moderate to good conductor of heat, making it a versatile choice for general cooking. Unlike cast iron, stainless steel doesn’t require “seasoning” (a process of priming an iron pan with oil to make it non-stick) and has better heat conductivity. Its unreactive nature enables its use with a wide variety of foods, and it is more durable than pretty much any other cookware option. As a general-purpose cooking tool, a steel pan trumps Teflon or other nonstick pan options due to its superior heat retention, surface less prone to scratching, and ability to reach over 260 degrees Celsius without leaching harmful fumes into the air.
Now that we have established the steel pan’s merits, let's move on to the part that leaves most novice chefs stumped: how do you use stainless steel without leaving half your breakfast stubbornly glued to the pan? The key lies in heat management. Let’s distinguish two different uses: high-heat searing and low-heat cooking.
High-heat searing is ideal for steaks or other proteins, yielding a rich color and satisfyingly charred crust through the coveted Maillard reaction. When searing something on high heat, you first want to make sure that your steel pan is on medium-low heat, between 350 and 450 degrees Fahrenheit (177-232 degrees Celsius). This will likely take about 4-5 minutes. You can verify that the pan is at the correct temperature through the use of the aforementioned water droplet—formally known as the Leidenfrost effect. When a droplet of water encounters a sufficiently hot surface, a layer of vapor will form between the surface and the water, forming the droplet into a ball-like shape that is able to glide across the surface of the pan at high speeds. After success in the water-droplet test, you want to pour out the water and add your fat source. For searing, a high-smoke-point oil or clarified butter is ideal; allow it to coat the pan completely. At the correct starting temperature, the oil should shimmer slightly after being heated for ten seconds. At this point, you are ready to start searing! Just be mindful that adding cold meat to the pan can cause its temperature to drop rapidly, possibly reducing the quality of your sear. To mitigate this issue, let the meat come to room temperature before you start cooking it.
The second method is a little more complex, but ideal if you are cooking something at a lower temperature, like eggs, pancakes, or tomato sauce. This method utilizes a property known as partial polymerization, also referred to as surface polymerization. You begin the same way as the first method—heat the pan until you can observe the Leidenfrost effect and swirl a high-smoke-point oil over its surface, coating the entirety of the pan, until the oil begins to smoke lightly. At this point, a temporary polymerized layer will form on the pan’s surface, adhering to microscopic irregularities on the steel. You can then remove the pan from the heat and allow it to cool until warm—about 5 to 10 minutes. After the slight cooling, gently absorb the excess oil. If everything has gone to plan, you should be able to see a barely visible golden sheen: the polymerized layer. This polymerized layer renders your steel pan practically non-stick for multiple uses. Once the layer wears off, the process must be repeated to form a fresh layer.
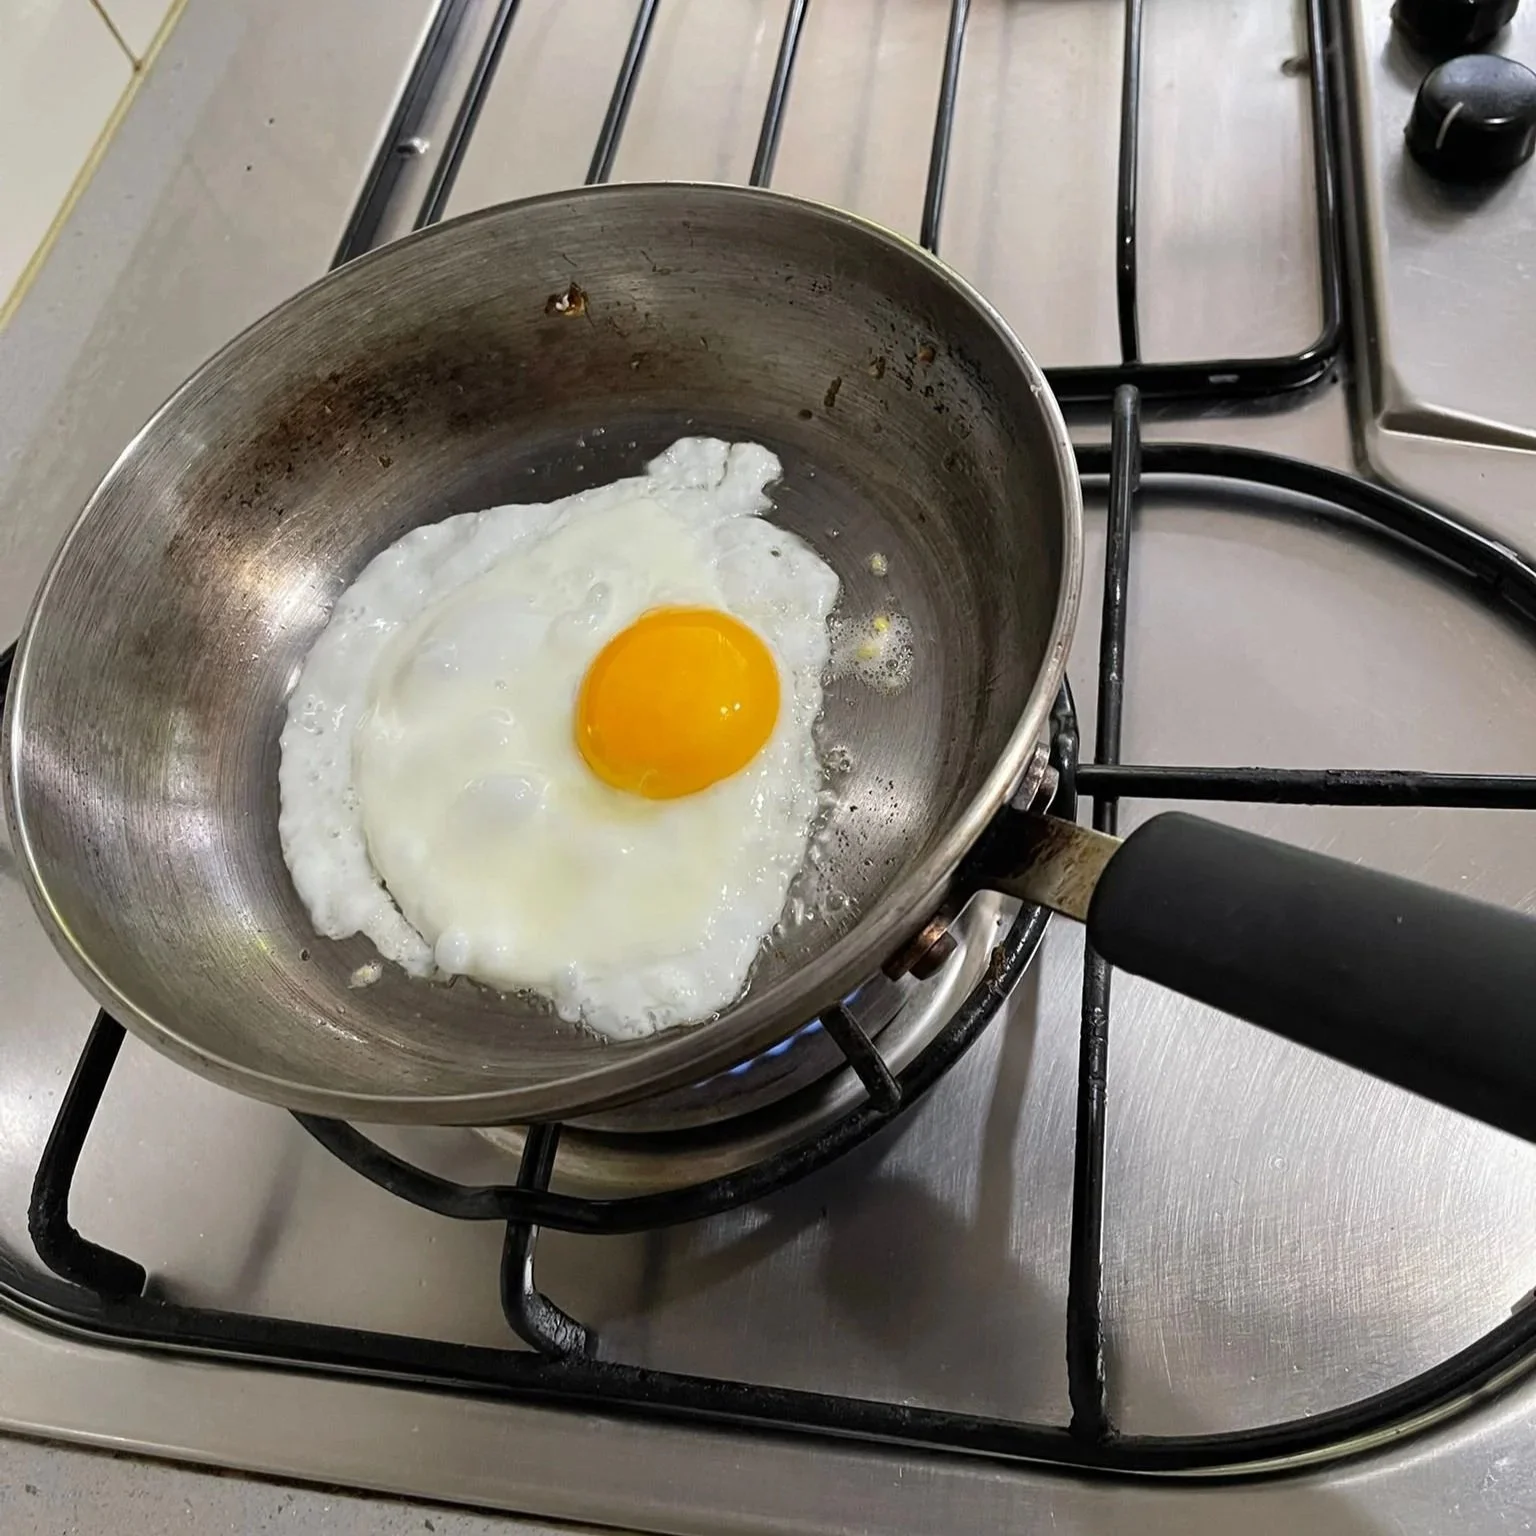
Frying an egg on steel pan
Stainless steel might not promise the effortless slipperiness of a nonstick pan or the rustic romance of cast iron. Still, once you understand how to work with it, it rewards you with consistency, durability, and a deeply satisfying sear. Like any worthwhile skill, mastering the steel pan may take some time—but the payoff is a reliable tool that will likely outlast your lease, your TikTok phase, and maybe even your next few apartments.