Salted Egg Yolk Kaya Cookies
Author & Photographer: Shyn Ru Looi
Baker after baker, blogger after blogger seemed to be posting the same kinds of recipes; banana bread, rhubarb pie, key lime pie, salted caramel brownies, no-bake cheesecake-- you name it, they have it. As tempting as they all sounded to me, I wanted to try out a recipe I could be genuinely excited by. After a few days of scouring multiple blogs, I gathered enough inspiration to try my hand at something new. I can’t claim with absolute certainty that nobody has ever made a version of this recipe before, but the thought that I might actually be the first to attempt it made me really, really, excited.
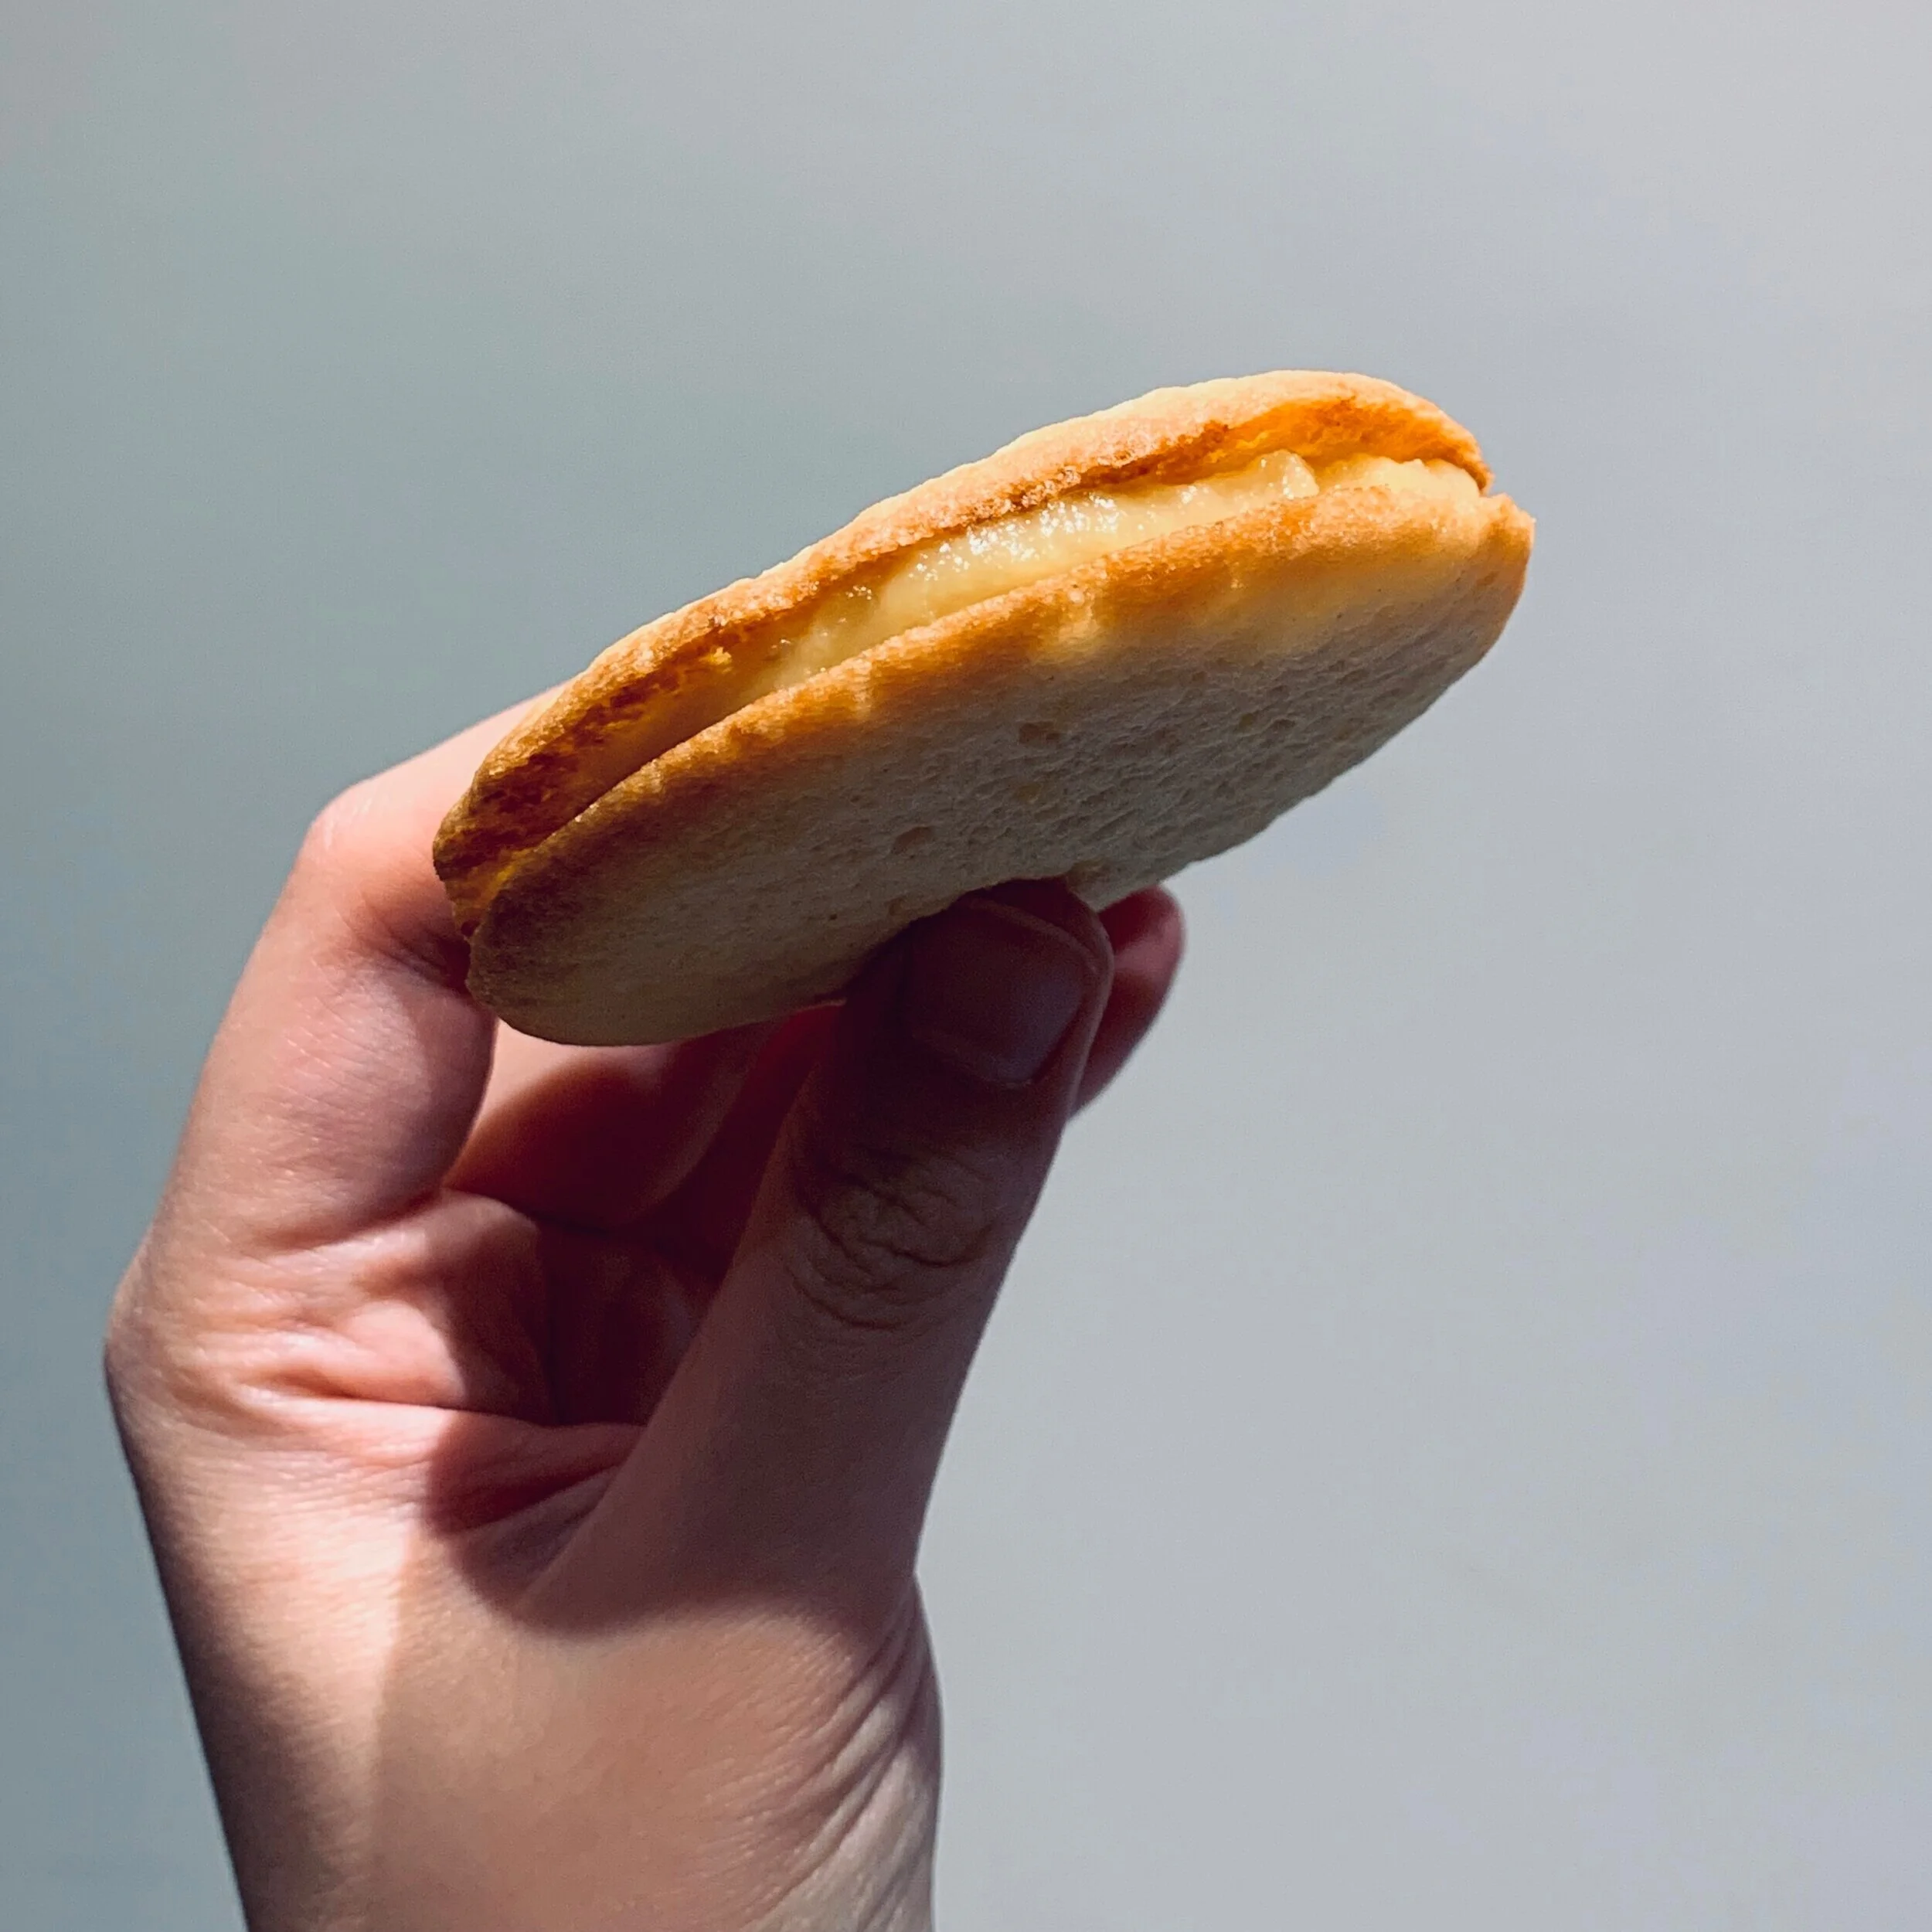
Salted. Egg Yolk. Kaya. Cookies.
Okay, before you start questioning my sanity, allow me to walk you through why I came up with such an invention. I had a craving for both kaya and foods with salted egg yolk, though not in combination. But as I continued thinking about it, I wondered, why not? There are kaya mooncakes with salted egg yolk in the middle, so why not have it in the form of a cookie?
I wanted to make this even more challenging, so I decided I would cure my own egg yolk and make my own kaya. For those who don’t know, kaya is a coconut jam made from palm sugar and coconut milk/cream that is usually eaten with toast or plain crackers. The traditional method of making kaya requires an extensive period of stirring, but I was able to find a quicker recipe; the trick is to remove the egg whites so the kaya will come together faster.
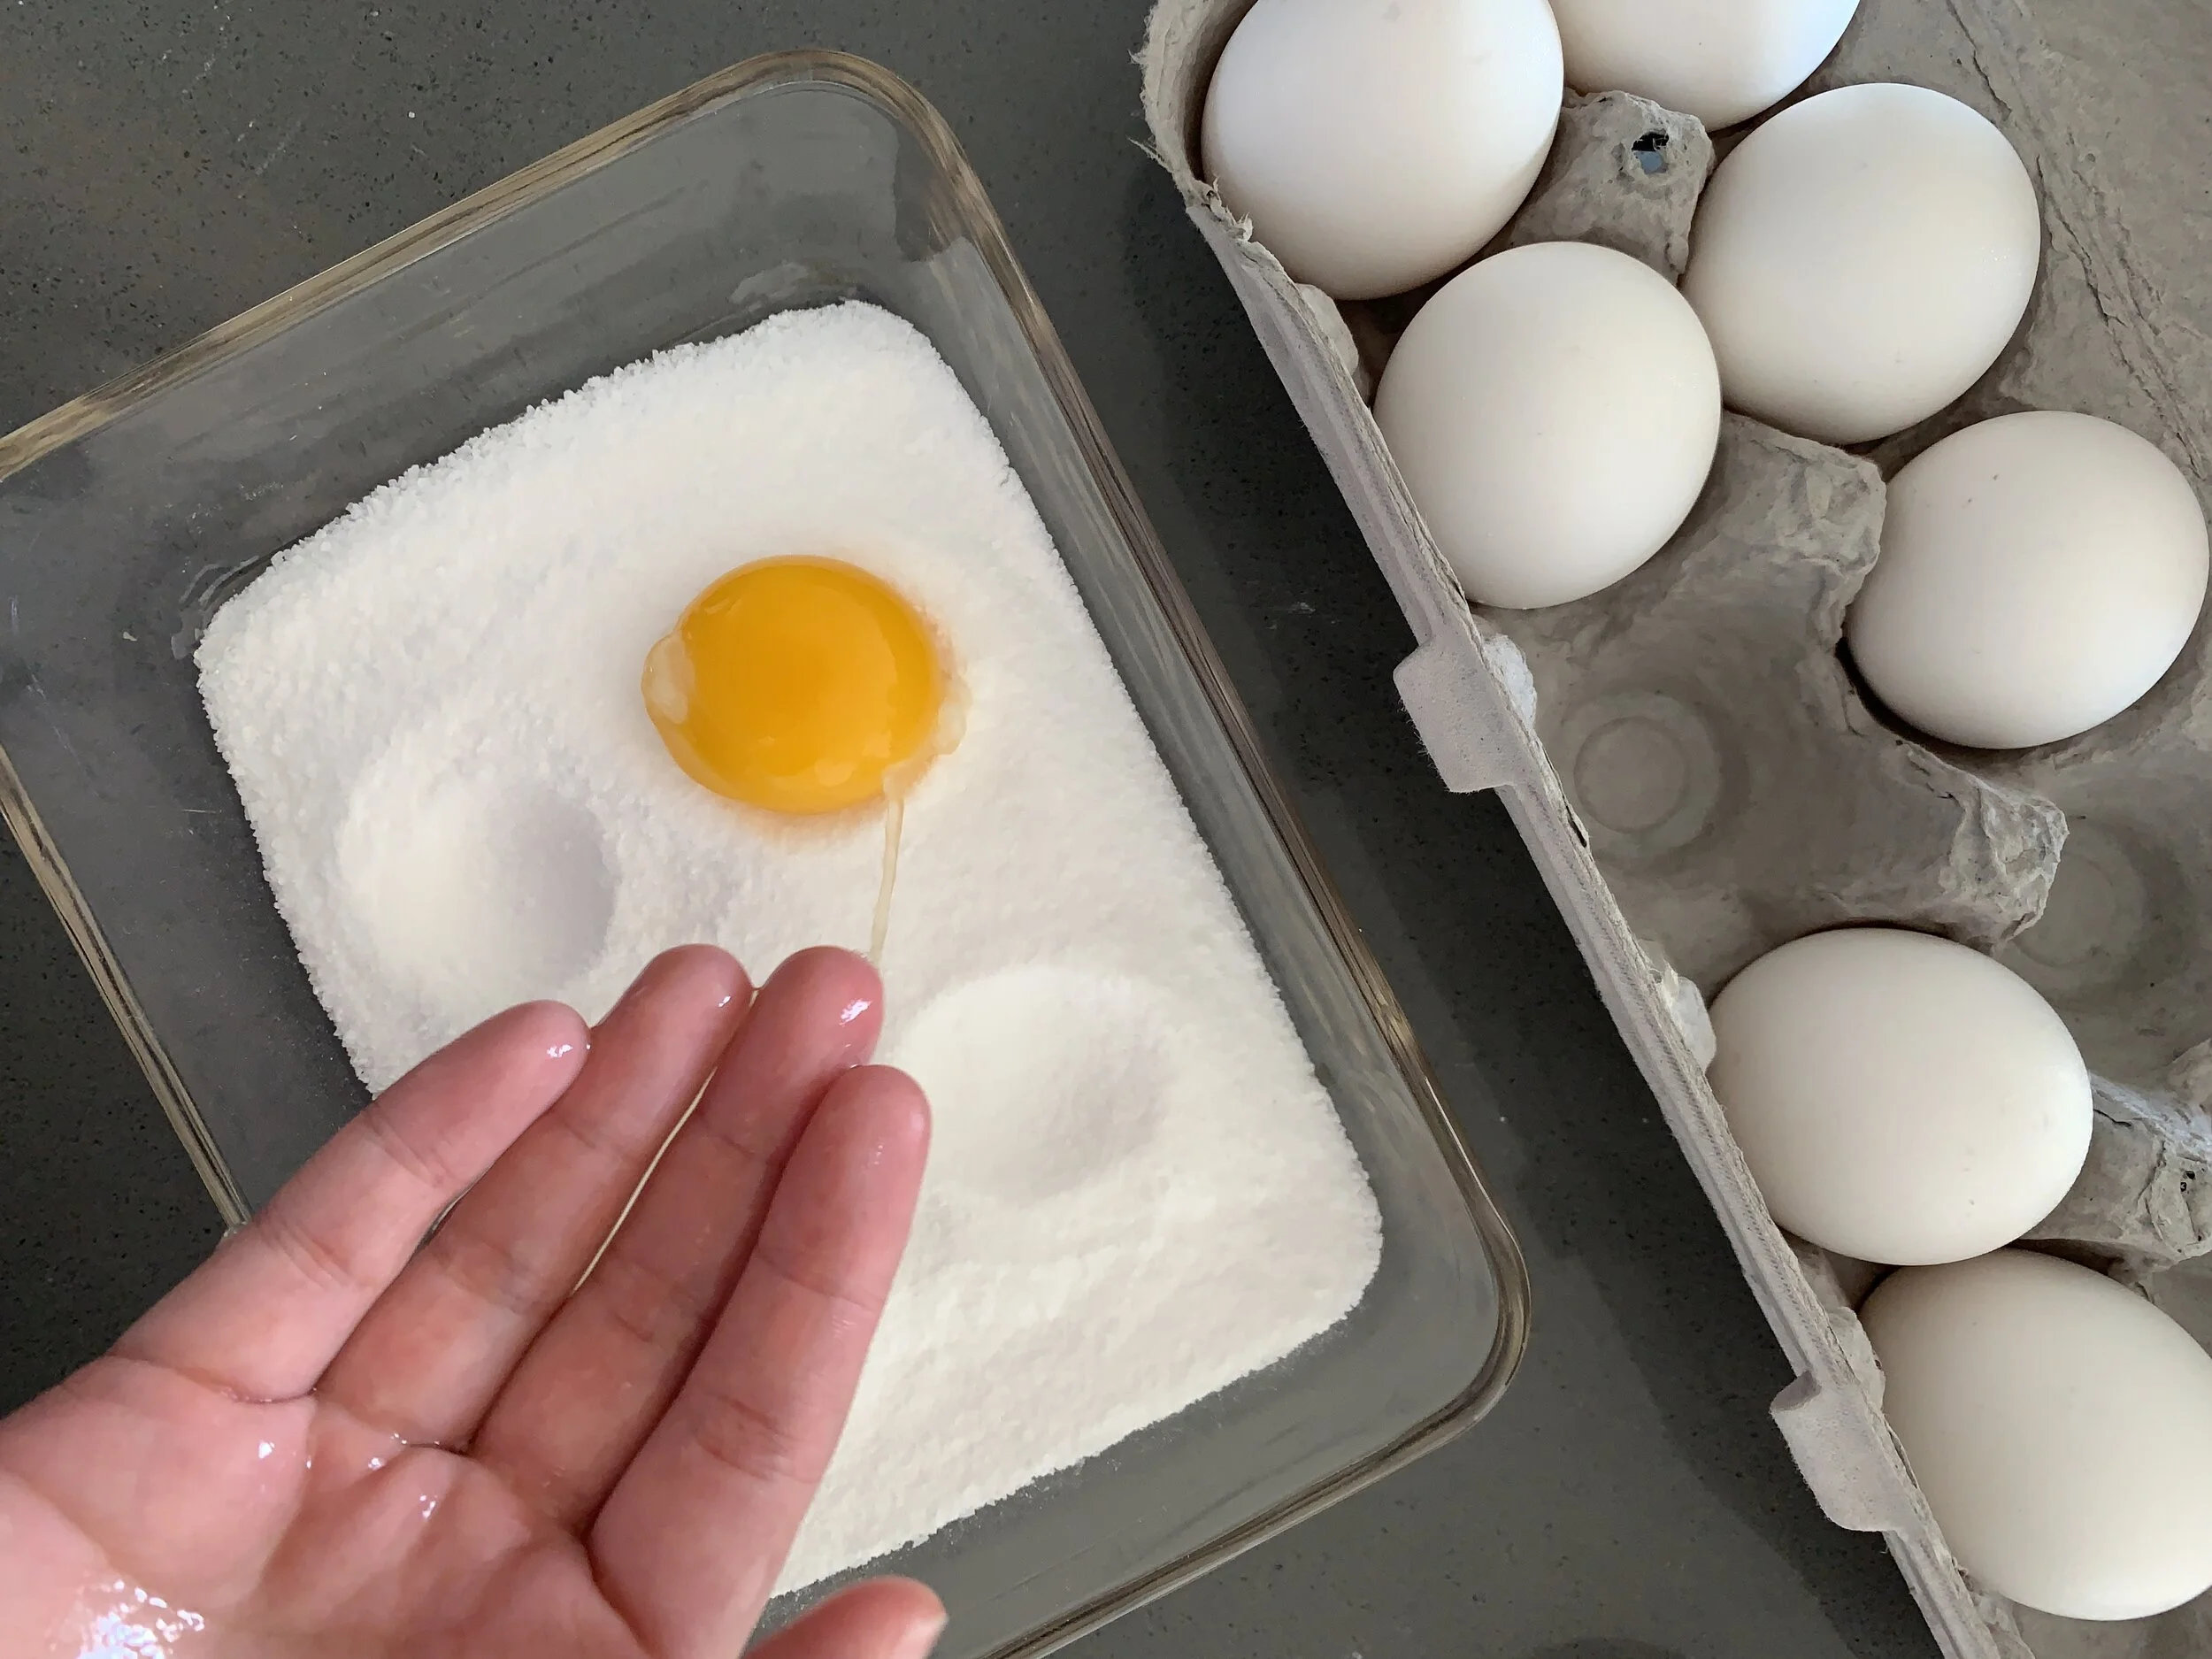
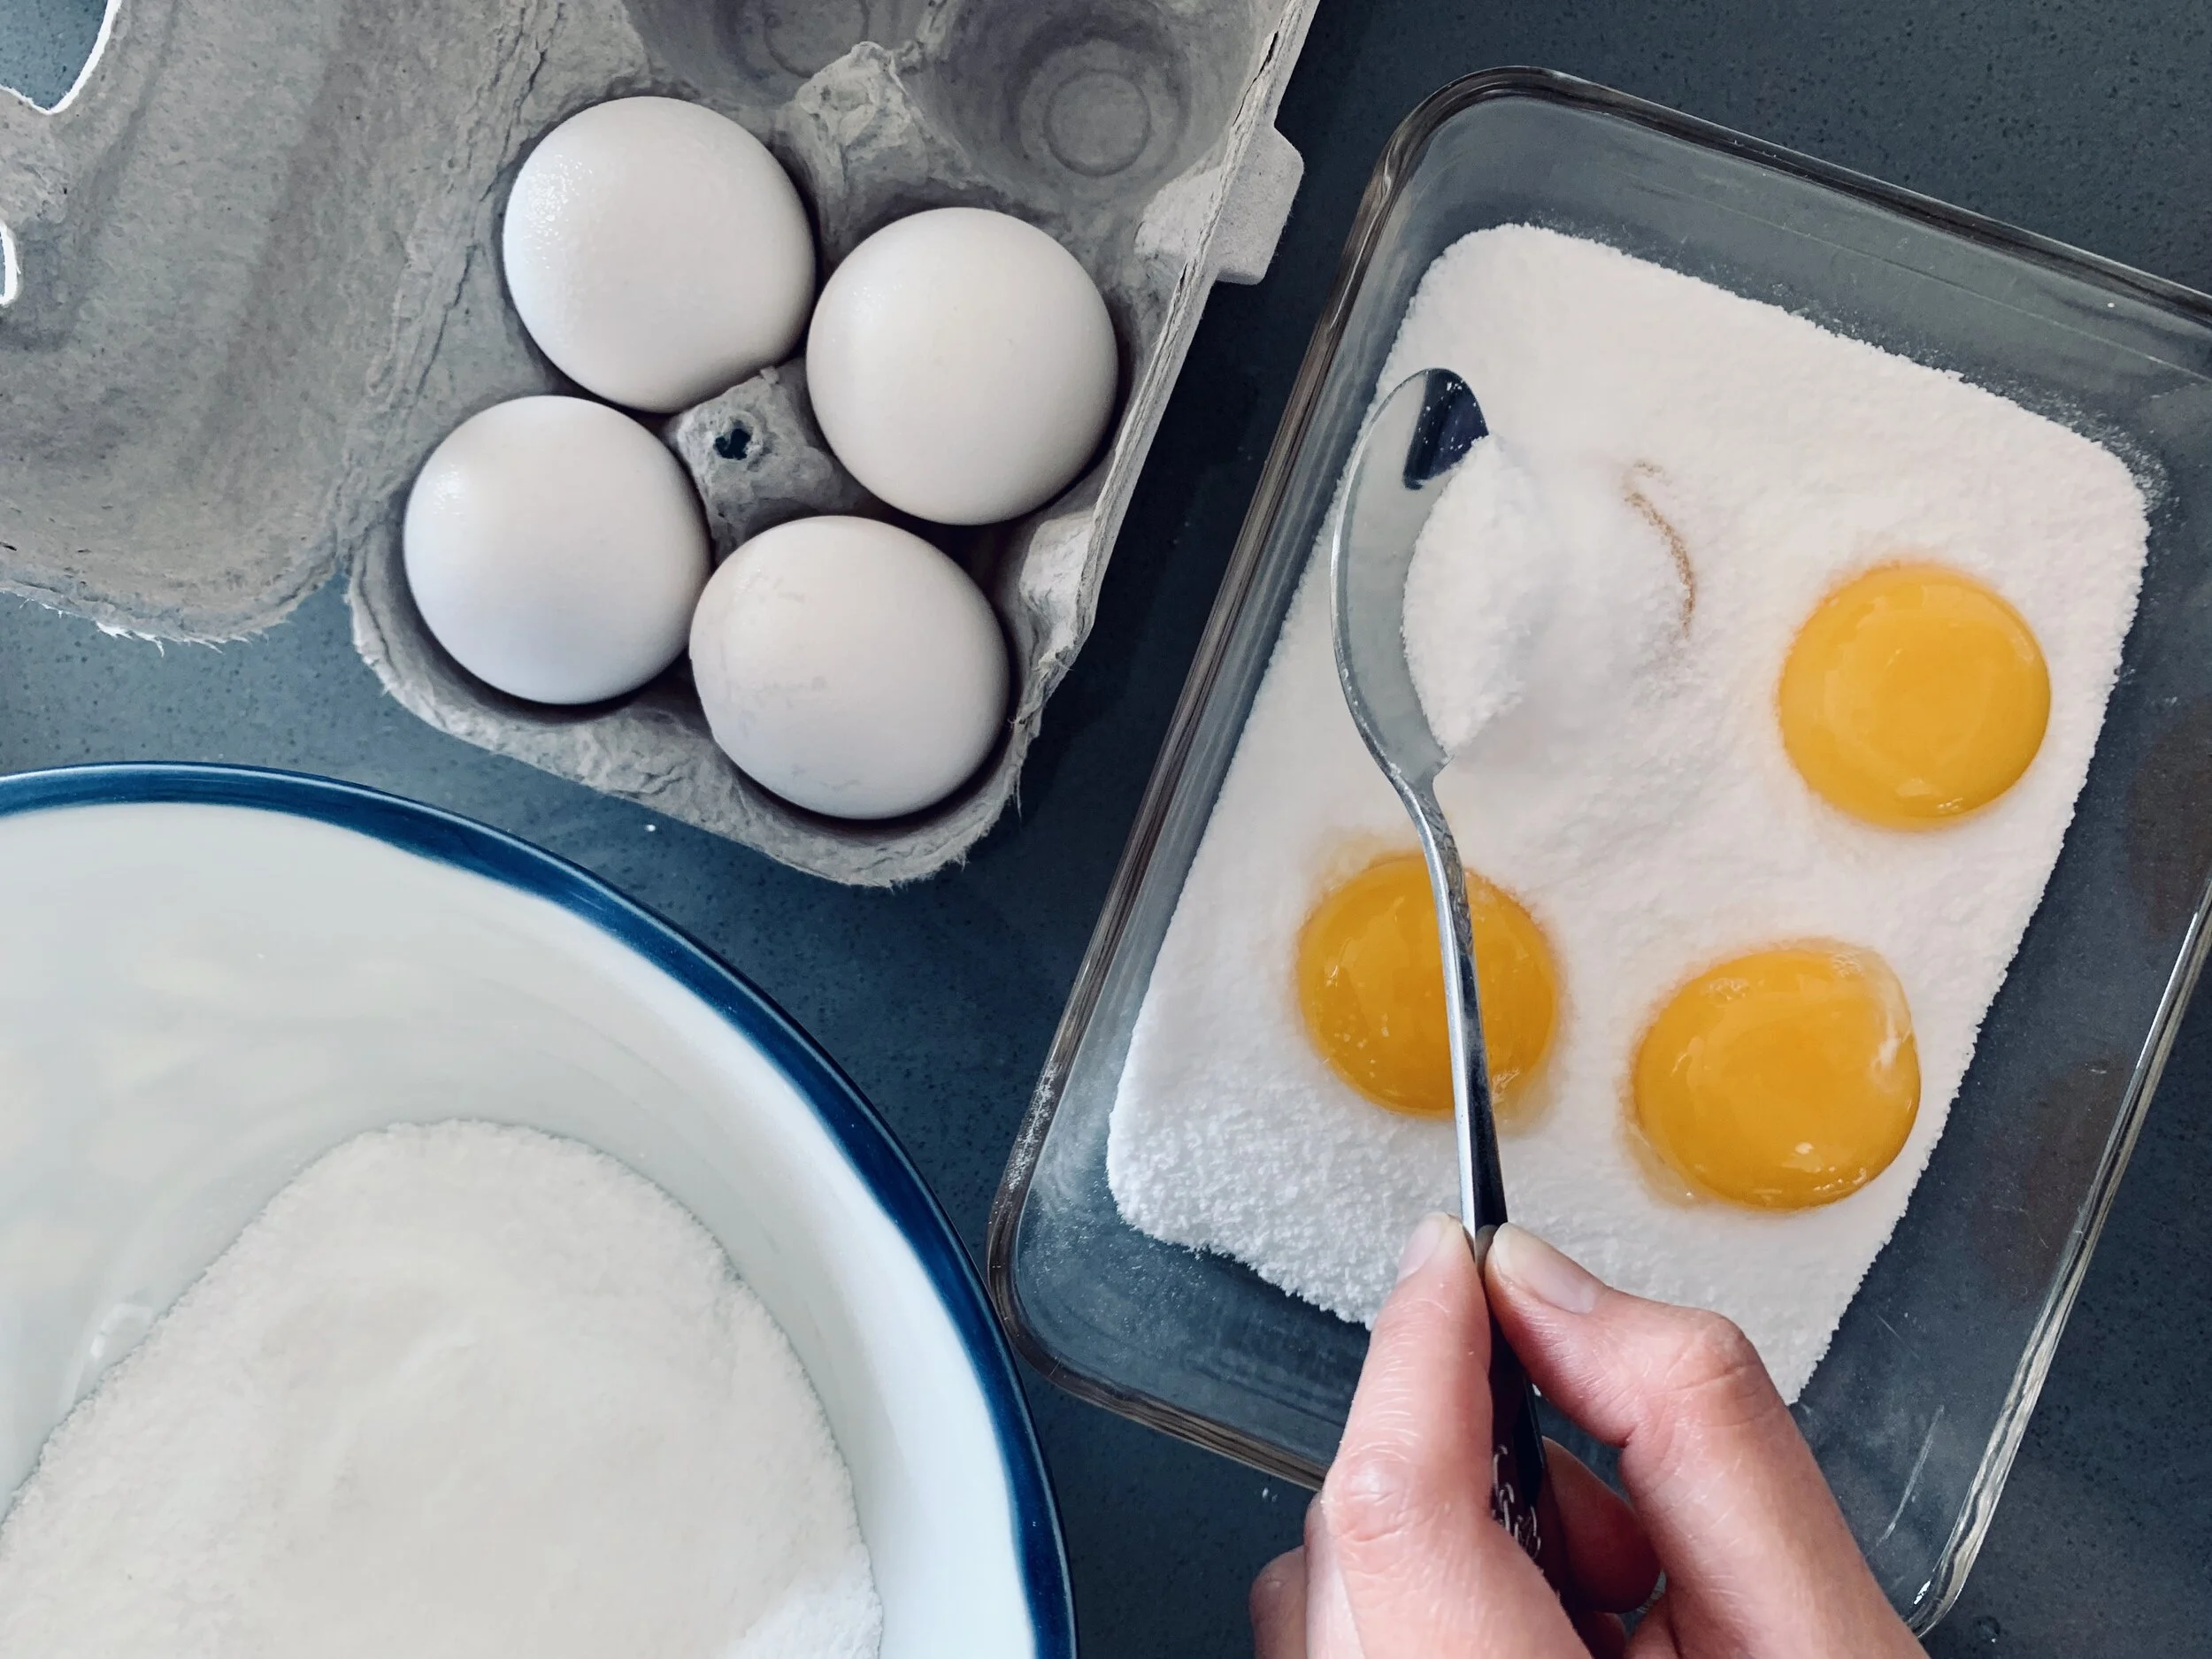
I began the process by curing the egg yolks. I cracked 4 eggs, separated the whites and yolks, and then placed the yolks into a wells I created in a salt and sugar mixture. I covered the whole thing with saran wrap and let it sit in the fridge for 4 days.
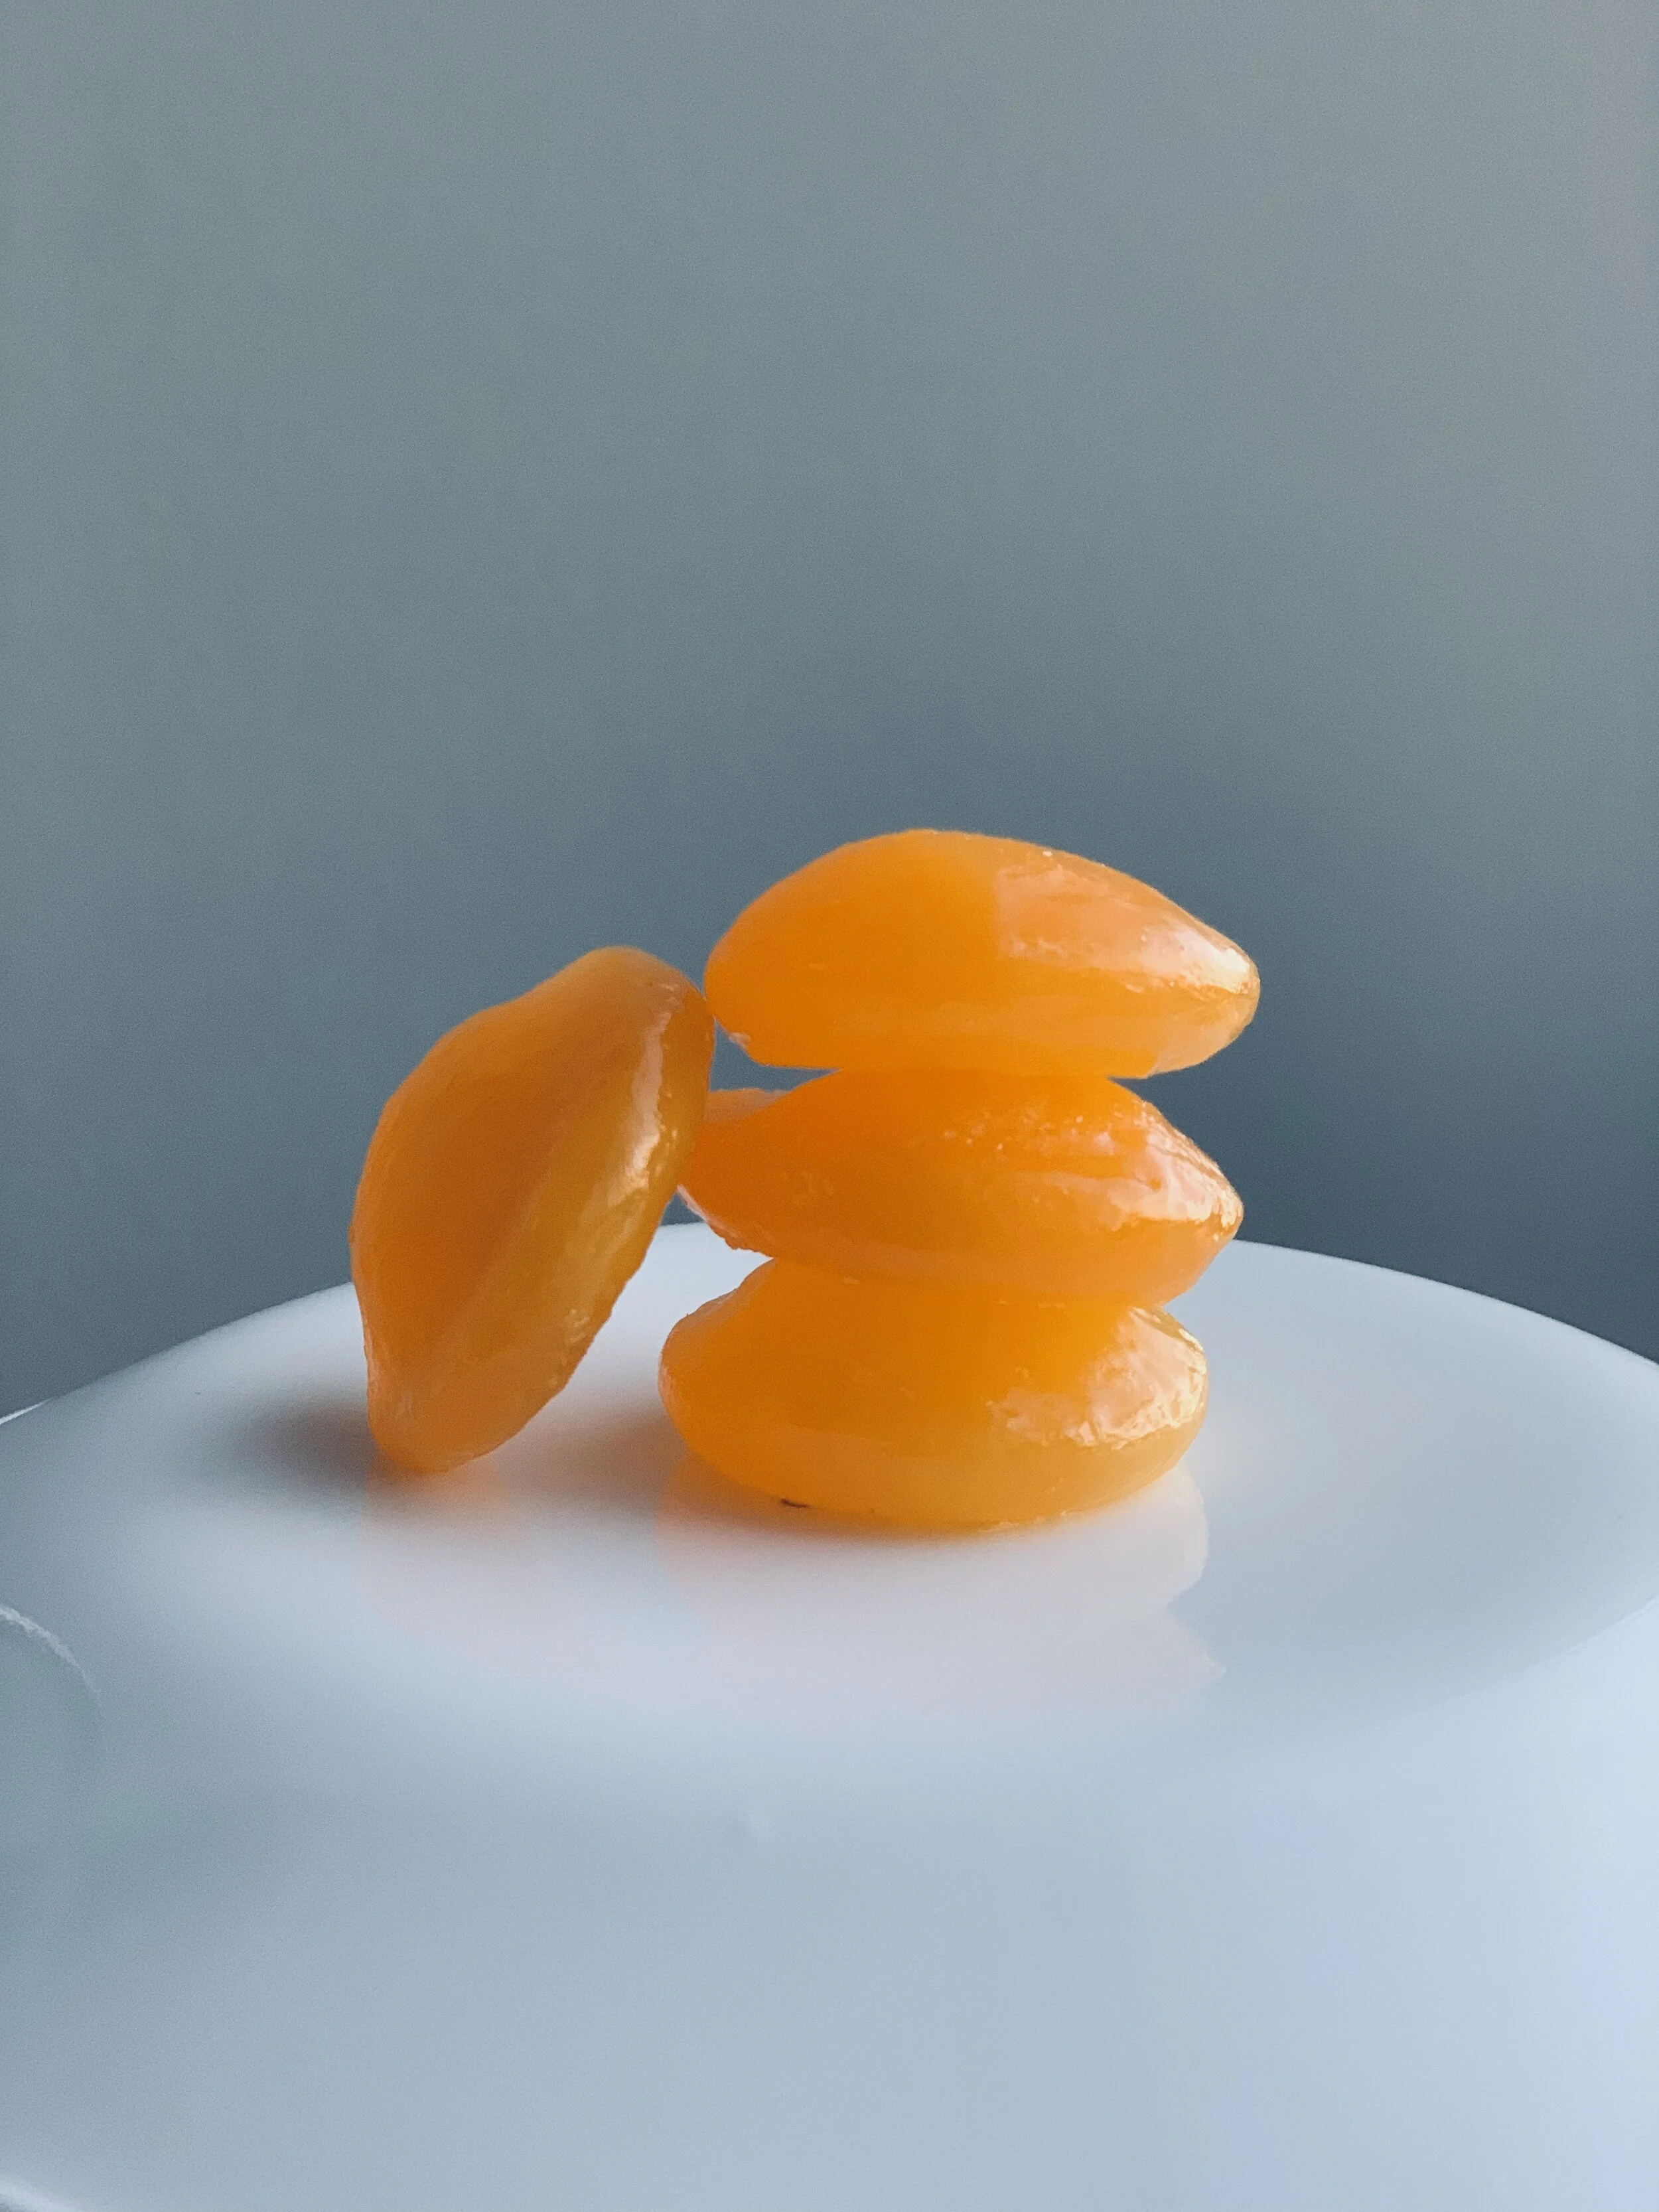
After 4 days, I took the egg yolks out out, brushed off the mixture and stuck them in the oven to dry them out. They looked quite pretty and smelled as they should. And then I took a bite.
They didn’t quite taste like salted egg yolks. Granted, they were salty but did not have the signature umami flavor and dry, almost melt-in-your-mouth texture. After taking a few more bites, I realized what the problem was. The egg yolks simply weren’t cured enough. The outer layers were salty and had that flavor I was after, but the insides were left unseasoned. So, recommendation #1: Cure it for longer, perhaps 7-9 days.
Moving on, I got started with the kaya. I used granulated sugar, palm sugar, gula melaka (palm sugar from Malacca, Malaysia) and coconut cream (not coconut milk). I omitted the pandan leaves as I did not want to go all the way to Argyle to buy some, and because I actually prefer kaya without the pandan flavor. I cooked it all in 10 minutes and tasted it. I thought the kaya was not that tasty—it lacked something, butI couldn’t tell what. After tasting it a few more times, I passed it on to two of my Malaysian friends and they excitedly quipped that it was amazing. I suspect that it’s missing the nostalgic fondness I have for the kaya back home. But to each his own; you should try making it and decide for yourself! Recommendation #2: Tweak the ratios, adding more palm sugar and less granulated sugar for a more potent palm sugar taste (the way I like it).
On to the last part: the cookie. I looked for a simple, thin, crispy butter cookie recipe and grated the egg yolks that I cured into the batter. They came out looking quite pretty, speckled with bright egg yolk pieces. I sank my teeth into one and took a moment to contemplate it. I thought the salted egg yolk flavor was not coming through the butter cookie. I ate another three cookies and was still disappointed that it didn’t taste very much like salted egg yolk.
I went ahead and sandwiched the kaya between two cookies and tasted it. The combination was divine, but it still didn’t taste like salted egg yolks. After my 1435th bite of the cookies, I decided I was done for the night and stored the rest in an airtight container. However, a few days later, when I offered the cookies to a friend, she broke it in half and shared it with me. I realized the the salted egg yolk flavor was actually shining through, though it was quite subtle. I think it’s because I tasted so many of the salted egg yolks and cookies that night that my tastebuds became immune to the flavor of both of them. Another small issue I had was that my cookies came out on the thicker side, and therefore weren’t as crisp as I wanted them to be. Recommendation #3: Invest in an ice-cream scoop so you have evenly thin and round cookies. I didn’t have one so I used two teaspoons, but some cookies were crisp while others were not.
So, is this a recipe for disaster? If you choose to attempt this recipe and follow all three recommendations, I think it would be a success! The cookies and kaya on their own tasted amazing, so with a few tweaks, I don’t see why it wouldn’t be phenomenal. I have yet to re-attempt this recipe (my waistline needs a break from these cookies), but one day, I will.
Salted Egg YolksIngredients:
1 cup salt
3/4 cup sugar
4 eggs
Instructions:
Place the salt and sugar mixture in a food processor and blitz until fine and fully incorporated.
Place half of the sugar-salt mixture in a shallow glass dish and make 4 wells by holding an egg vertically and gently sticking it into the mixture,rotating in the shape of a small circle until a well is formed.
Separate the egg yolks and whites one at a time. Make sure there is as little egg white attached to the yolk as possible. Gently slide the egg yolk into the well and repeat with the remaining 3 eggs.
Use the remaining salt-sugar mixture to completely cover the egg yolks.
Wrap the dish with plastic wrap and place it into the refrigerator for 8 days.
After 8 days, remove the yolks from the salt-sugar mixture and brush off the excess salt using a brush. Run the yolks under running water and pat dry using paper towels.
Preheat oven to 200 F. Place yolks on wire rack* and dry them out in the oven for about 30-40 minutes, depending on your oven.
* If you don’t have a wire rack, place them on a baking tray lined with parchment paper and bake normally. After 15-20 minutes, take them out and flip them over so both sides dry out evenly.
Kaya (Coconut Jam) Ingredients:
1/4 cup white granulated sugar
½ cup palm sugar
1 cup coconut cream (not coconut milk!)
4 egg yolks (make sure no whites)
Instructions:
Place sugar and cream into a pot.
Bring to a boil on medium heat and take it off the heat.
Let it cool for 1 minute and beat the egg yolks and mix until smooth.
While whisking the yolk mixture, gently stir in one spoon of the sugar-cream mixture. Repeat with another 5 spoons of the sugar-cream mixture. This is to ensure the egg yolks do not curdle and turn into scrambled eggs.
Combine the two mixtures and make sure they are fully incorporated. Return the pot to the stove and put it on medium-low heat and cook until it resembles a smooth, slightly thick ribbon stage paste (Lift your spoon and drop the mixture, it should fold onto each other like a piece of ribbon).
Immediately remove from heat once that is achieved.
Let it cool and store in an airtight container.It will last for 1- ½ weeks.
Salted Egg Yolk CookiesIngredients:
1 stick butter, softened
½ cup sugar
1 egg
1 tsp vanilla extract
¾ cup flour
dash of salt
4 egg yolks, grated
Instructions:
Preheat oven to 350 degrees. Line a baking sheet with parchment paper and place in refrigerator to chill.
Cream butter and sugar until light and fluffy. Add egg and vanilla, blending until well-combined. Add flour and salt. Blend again.
Stir in the grated salted egg yolks.
Drop by small teaspoons (I used a small cookie scoop) onto a chilled baking sheet, 3 inches apart.
Bake in a 350 degree oven for 7-8 minutes, just until edges are golden. Remove from oven.
Let cool on baking sheet at least 10 minutes. Transfer cookies onto cooling racks to cool completely.
For the final product, spread a modest amount of kaya between two salted egg yolk cookies. You don’t want the kaya to overshadow the taste of the cookies. The end product should be a sandwich cookie that tastes mildly salty and pleasantly sweet.
The recipe above might seem long and complicated, but really, it can be done in phases. Curing the egg yolks, making the kaya and baking the cookies can all be done on three separate days. Assembly then would probably only take 15 minutes! Give this recipe a try, folks, and as always, you’re welcome!


